Why making a water pond?
We love birds and love to attract them to our garden. Building a wildlife pond is a great way to enhance wild watching in your backyard. Of course it is a great idea for bird photography as well. Here's how to build a water pond for birds:
Firstly, make sure you chose the right place to set the pond: quiet and inviting. A place you have previously spotted birds around is generally a good choice. You may also consider the vecinity of other sources of water where birds could already drink/bath. Birds prefer open and clear spaces, with nearby trees to roost.
Birds need to drink but they also love to enjoy baths. So your pond will be made up of a deep zone surrounded by a shallow area (beach) suitable for birds to bath on. Notice both areas on the picture below. Recommended garden pond depths are:
- Deep zone: some 50 cm (1 ft 8 in) deep in the middle part.
- Beach: 40 cm wide, 0 to 10 cm deep (allow a gravel couch).
The borders are quite important. Ideally, create a slope to make the shore gradually get to the water. This profile works great for passerines and small birds. The bath area is quite irregular on purpose to allow multiple depths for bath. So the stone or gravel layer gives a free water depth of between 0 and 5 cm (up to 2 in).
Steps for building a water pond
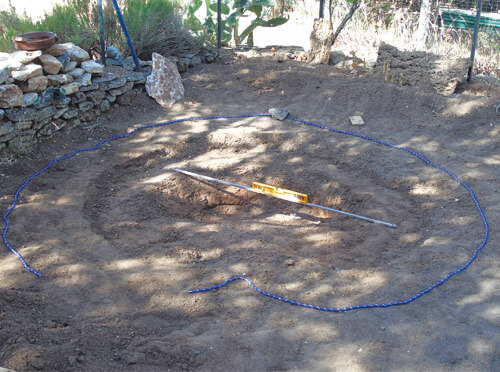
Marking. Laying a rope is a good way to mark the perimieter of the pond. Don't forget you'll need at least some extra 40 cm on each side to cover the lining. And yes, do take time to calculate how much liner you will need. In our case it was 4 m x 4 m.
Excavation. This is the tough part of the job and you may need a few hours to get a good result. It is important to use a level to verify the future water line. Once you're done with this, check that there are no sharp edges left. If that is the case, use a club hammer and even add a sand/clay layer.
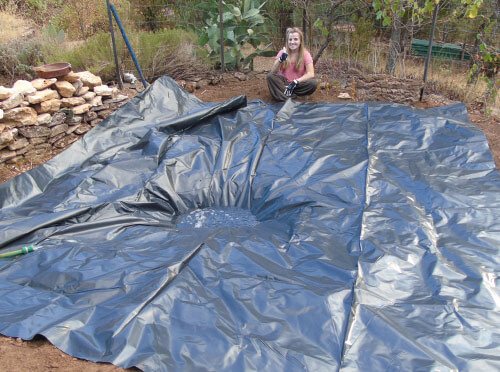
Lining. Make sure you add a protection layer. Pick something that is cheap, like big bags, old curtains, etc. A failure to do this could mean a broken liner afterwards. Check the levels again, correct if necessary and finally set the lining and slowlyt fill it with water. At this point you still can tuck the liner to modify the folds. If you can only afford thin plastic liners, we recommend you to use two layers.
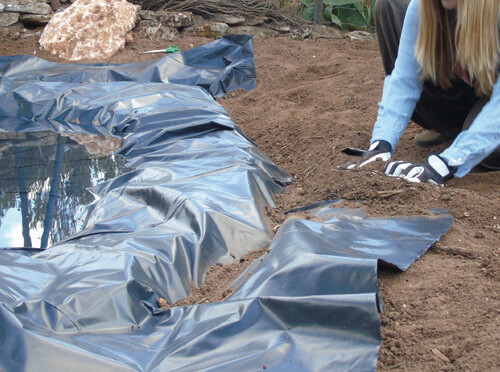
Attaching. Time now to excavete a small perimeter trench to attach the liner. Refill it with earth or stones. For shallow ponds we recommend a 10 cm x 15 cm trench.
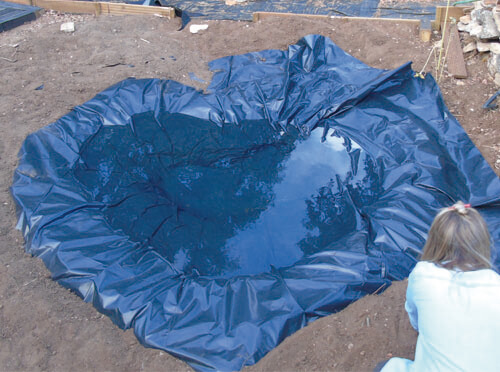
Of course you can add a solar pump, a siphon and all the elements will just look great and will make cleaning easier. However a simple pond as described above will keep itself clean if appropriate native water plants thrive and so the wildlife. It's amazing how fast your work can develop a community to butterflies, flowers, frogs...
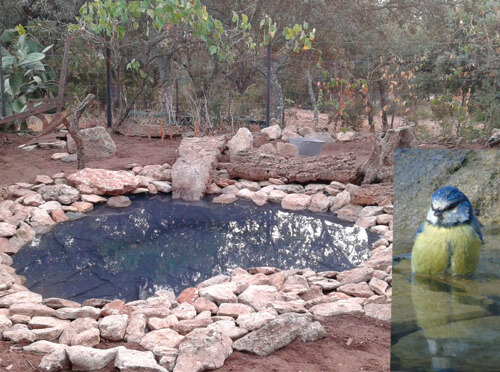
Above's the final result. It took 22 hours of manwork and birds started to show up in less than 2 weeks. Now it's time for yours. We'd love to inspire you to build your own backyard pond. Let us know about it!
Click here to read how to build a bird watching hide (link will soon be available)